Friday, December 11, 2009

Toffee Heaven


A while back I wrote about Lyle's Golden Syrup and how I was going to try it in my toffee recipe instead of light corn syrup. As you may know, light corn syrup has the dreaded high fructose corn syrup in it. Paul has accused me of hating corn; au contraire, I like corn very much. Real, natural, unadulterated corn, the way God made it. Anyway, I wanted to retool a chocolate almond toffee and I've done it, hopefully in time for you to try it for the holidays.


There a couple of reasons I can think of offhand to use corn syrup: for texture and to keep sugar syrup from crystallizing. Lyle's is a partially inverted sugar - don't ask, just go with it, like me - which it appears won't crystallize. You do NOT want your sugar to crystallize when making candy, unless you do want it to. I love to cook sugar; especially to make caramel, it's serious alchemy. Just make sure you have a candy thermometer, unless you know the Grandma Brown Method of dropping balls of hot sugar in cold water. With a thermometer, it's a piece of cake, I mean toffee. I recommend spreading the hot toffee on a half sheet pan (turned upside down) over a silpat.


Chocolate Almond Toffee


8 ounces toasted sliced almonds
1 1/4 cups organic sugar
1/3 cup Lyle's Golden Syrup
1/3 cup water or rum
8 ounces (2 cubes) unsalted butter, cut into pieces
1 teaspoon sea salt
1/2 teaspoon baking soda
8 ounces bittersweet or semisweet chocolate, chopped up

Put the sugar, Lyle's and water or rum in a medium heavy bodied saucepan and bring to a boil over medium heat. Boil 3 or 4 minutes until there are big bubbles. Cover with lid and boil 5 minutes more.

Uncover pan and carefully stir in butter and cook over medium heat until temperature reaches 300 degrees. Remove from heat and add the salt, baking soda and 1 cup sliced almonds. Stir well with a wooden spoon.

Pour onto silpat and spread out with an offset spatula. It's easier to spread evenly if you pour the hot toffee all over the silpat rather than in a pile. Try to get it about 10 x 13 inches. Let cool completely and blot the excess butter on the surface with a paper towel.

Melt chocolate in a heat proof bowl (I like my steel bowl) over a pan of simmering water, stirring occasionally. Spread over toffee with spatula and cover with sliced almonds while chocolate is still warm. Refrigerating the toffee speeds up the hardening of the chocolate; I put the pan in my cold garage for a few minutes. After the chocolate sets up you can cut up the toffee into pieces; they will crack into odd shapes, which just makes things interesting.

Note: I found that Lyle's Golden Syrup gave the toffee a deeper, richer flavor than light corn syrup. And that's a good thing.

Monday, December 7, 2009

Comfort Me With Pot Roast

Well, the weather has turned cold - it even snowed today - and it's definitely time for comfort food. My favorite comfort foods include braises, and pot roast more than fills the bill. Paul asked me last night if I would make him some pot roast soon and I decided to git'er done. It needed to include lots of root vegetables for flavor, texture and good nutrition and this recipe has all of that. This recipe is just a guideline, and you might not like beets or parsnips, but they really add to the quality of the dish.

2 1/2 pounds chuck roast salt and pepper
1+ tablespoons olive oil
1 cup medium chop yellow onions
1/2 cup medium chop carrots
1/2 cup medium chop celery
1/2 cup or so red wine
1 1/2 quarts organic beef broth
1 medium golden beet, peeled, cut up into 3/4" pieces
1 medium parsnip, peeled, cut up into 3/4" pieces
4 medium yukon gold potatoes, peeled, cut up in 1" pieces
1 cup baby carrots, or cut up carrots
1/8 teaspoon or so cayenne pepper
5 oz. frozen pearl onions
5 oz. frozen petite peas

Preheat oven to 325° with rack in lower third. Over medium heat, brown the chuck roast on all sides with olive oil in an a 5 1/2 quart dutch oven, preferably enameled cast iron, such as LeCreuset. Remove the roast to a plate and add the chopped onions, celery and carrots. Sweat until tender, about 5 minutes, then add the red wine and cook to reduce to nearly dry.

Put the chuck roast back in the pan, add 1 quart broth, about half way or so up the side of the roast. Bring to a simmer, then cover and place in the oven. Braise 2 hours or so, turning roast once. Add the beet, parsnip and potato pieces, along with the baby carrots and cayenne. You will probably want to add beef broth to bring liquid level back up. Back in the oven for 1 1/2 hours, check beef for tenderness; it should be fork-tender. Put the pot on the stovetop, burner on medium, and add pearl onions and peas. Simmer for 5 minutes or less, to finish off the dish. Serve.


Feel free to add more beef broth - the root vegetables absorb liquid. Beets are very dense and probably won't cook through in allotted time and will be firm. If you want them tender, add them at least 1/2 hour before the other veggies. Cayenne in moderation adds depth of flavor, not heat; it's wonderful in braises.

Notes on olive oil: I'm going to admit something to you. I've been using cheap olive oil, ignoring the probability that the evoo I've been buying at Trader Joe's isn't filling the nutritional bill. Yesterday I went to an olive oil tasting room in Fairfield with some friends and was given an education. Presuming they weren't filling me full of bull, good olive oil is supposed to have lots of polyphenols - the good stuff. You can tell if your olive oil has them if when you taste it, you get a peppery taste and sensation in the back of your throat. No pepper, no poly-p's, just oil. I've had that peppery experience in other tasting rooms, and I quite like it. SePay Groves also has a cooking oil with olive and safflower oils and a high level of polyphenols, and importantly, a high smoke point. I bought the organic Tuscan olive oil for dipping and salads and the cooking oil for, well, cooking. I'm guessing that the California olive oils being produced are the good stuff, but do your homework. I will. (By the way, I tasted my cheap oil and yep, no pepper taste!)

Coming up - for the holidays I am going to make chocolate almond toffee real soon, using Lyle's Golden Syrup instead of corn syrup, as promised. Wish me luck!


Sunday, November 22, 2009

More Turkey Talk

Paul asked me to roast a turkey this weekend and I wanted to try something new. For as long as I can remember, my family has always made a bread stuffing that actually is roasted in the turkey. And it's delicious. Over the last years I've also made cornbread stuffing, and crammed it in the turkey. It's all good. And, despite the fearmongers none of us have ever gotten sick.

Turkey prep has gotten interesting, what with brining, a real pain to do, and salting, which I haven't tried yet. Last week I watched the Barefoot Contessa roast a turkey, using truffle butter. She rubbed it on the breast meat, under the skin; I confess I have done that with chicken, only not with truffle butter. After calling a likely market for truffle butter (which I imagine is expensive) and they were out, I opted to make a compound butter. I let a cube of butter soften and used a fork to mix in fresh minced lemon thyme and a little Penzey's shallot salt. The hard part is separating the skin from the breast (it tore in a couple places - just a little) - it's darned cold under that skin too!


I've always had trouble with frozen turkeys; how long do you take up half your refrigerator while it thaws out? Well, I have my answer. I bought a 15 1/2 pounder on Monday and set it in the roasting pan to catch any juices and then set it on a shelf in my refrigerator. On Friday I cut open the wrap to let the air get to it. Saturday morning it was good to go. Per the Barefoot One I only stuffed it with salt, an onion cut into eighths, a head of garlic cut crosswise and a handful of thyme. Rubbing the turkey with olive oil helps with browning, generous amounts of salt and pepper are a must. The neck, a cut up carrot, onion and celery were put in the roaster to add flavor to the drippings. I added some chicken broth for moisture. It baked at 325 and was done in about 3 hours.

I made the gravy per my previous post and all were delicious. The turkey was moist, tender and flavorful. This is so easy I highly recommend it. Go get your turkey and gobble!

Thursday, November 19, 2009

Let's Talk Turkey Gravy

Making gravy has never been my favorite activity; it makes me nervous. My grandmother made great turkey gravy, and my brother Greg picked up the baton and makes it the way she did, which I just couldn't describe for you. I know it involves whisking in flour.

Then four years ago Bon Appetit magazine published an article by Alton Brown (Food TV) on Thanksgiving Day turkey and I was saved from turkey gravy hell. The link below is to his stock and gravy recipe. The gravy secret is using schmaltz manié as your thickener. Definition time: schmaltz is rendered poultry fat, usually from chicken. Manié is French, referring to the hand. The usual incarnation is beurre (butter) manié, where soft butter and flour are kneaded into a paste (by hand) and whisked into cooking liquid for thickening thereof. But Alton is making schmaltz manié, where we make turkey fat & flour balls!

The first time I tried this I made the turkey stock per his instructions and it turned out great, with enough schmaltz to make the paste I needed. Last year I tried it again and for some reason - no schmaltz! What a shock! So I used butter - beurre manié. It was delish, and buttery, but still turkeyish. This year I don't have time to make turkey stock so I will be using Swanson's organic chicken broth. I am going to see if I can squeeze turkey schmaltz out of the turkey drippings this way: lift the roasted turkey out of the pan and cover it with foil. While it's resting I will pour all the drippings into my fat separator. (I like my Oxo fat separator. Don't bother with a small one, it never worked well for me.) The fat will go into the freezer to cool off and stiffen up. I'll use the schmaltz to make schmaltz manié, and make up the difference with butter. You have to be able to weave and bob in the kitchen!
Since I won't be making my stock, I am planning to roast the turkey with the aromatics in the pan to flavor the drippings: onions, celery carrots, thyme. Whisk in the schmaltz manié thoroughly, adding a piece at a time until you have the desired thickness. Be sure to cook until
it no longer tastes like flour. It's easy. This gravy is smooth and flavorful with a white wine reduction. Alton Brown's complete instructions are here. If the link doesn't work, just go to epicurious.com and search schmaltz manié. It's a piece of cake, uh turkey.

Monday, November 9, 2009

Jello Country

On the road to the Genessee Country Village we passed a small but brightly colored billboard for the Jell-O Museum.Well, anyone who knows me, knows I can't pass up a lure like that. I grew up on Jell-O; Grandma Brown made a killer cranberry jell-o salad. I love strawberry pretzel jello. So after our village visit we headed into LeRoy (LEE roy or lee ROY, depending on who you ask) where jell-o was invented. We almost passed the place, there was a not particularly large sign on the sidewalk, and the museum was down a driveway behind a house. How cool is that? It's a small place with the history of jell-o for our edification. There was a display of over 20 kinds of gelatin products, which kind of surprised me; did you know agar agar gets gelatinous? I just thought it was one of those mysterious ingredients on food labels. I feel so enlightened. By the way, gelatin is made from beef and pork hides. Hope I didn't ruin it for you.


We headed to Corning next; Corning is where - drumroll please - glass is made! Ok not just glass, but also, think Corningware, Corelle... When I was growing up I thought Corelle was the only kind of dinnerware available! There is the Corning Museum of Glass, and it's a beauty. They have examples of glass gew gaws dating from before the Romans. I was all over the Hot Glass demo - our master glass blower made a pumpkin. It's not exactly an easy hobby to take up.
Corning seems like a really nice town, and in case you go... for coffee, try the Soulful Cup on Market Street. I ordered a cafe mocha (I've given up on ordering cappuccinos) and asked for foam. And I got foam. In a nice big cappuccino type cup. It was wonderful! For breakfast try Crystal City Cafe and Bakery. I've included the link so you can listen to Mambo Italiano! They have the usual breakfasts on the menu, and also pretty nice looking baked goods. Our food was good so I give it a thumbs up.


Paul and I are restless so we moved on to Jamestown, the birth place of Lucille Ball. How could I pass that up? Definitely had to hit the Lucy-Desi museum, which is small and not actually a huge deal. I will say they had recreated a couple of sets from I Love Lucy, which was pretty cool. It was strangely cool to see their apartment in color.

The night before the museum we ate dinner at Roberto's at the Ironstone, on 4th street. Did I tell you I find restaurants by searching the internet? Roberto's is a warm and friendly family owned old-fashioned style Italian restaurant. I decided to try an Italian American classic, baked ziti. It was pretty tasty, with one large, tender, tasty meatball on top. The owner, Fred Yezzi, (his co-owner wife Tammy is the kitchen honcho) confided to me that they get their meatballs from a supplier in Buffalo; they just can't make enough themselves. Paul had spaghetti and several meatballs. Their marinara is rich and flavorful and dressed the spaghetti as well as my ziti. Of course, being who I am, I can't help but think of ways to change the ziti, such as a tomatoey beschamel, more cheese, etc. But, does the ziti want to be changed? Will it still be the ziti? I'll try it and let you know.

It was time to head back to Cleveland OH, and I must say the drive back through the narrow, green, lush valleys of New York got monotonous. I live in California, I'm not used to that much green! I jest. A little. Back in Cleveland (actually Brooklyn) we spied Carrabba's across the street from our motel (Hampton Inn - I loooove Hampton Inn) and decided to try it. It's set up a lot like a Macaroni Grill, only I think the food is better. I tried their chicken marsala and it was very good - they actually use marsala wine. Since they gave us a coupon for a free appetizer if we came back and I'm a sucker for those coupons, we went back the next night - our last evening. The food was still good. I have one regret which makes me grind my teeth a bit - Iron Chef Michael Symon's restaurant, Lola Bistro, is in Cleveland and I had totally forgotten about it until I got home.

One last stop and I'm outta here. The Westside Market in Cleveland is a must for foodies. It's an inside food market - a must in the winter - and it's a wonder. There are butcher shops, pastry
shops, spices, a Hungarian meat market, coffee, falafel stand, on and on. There's a second, smaller building with fresh beautiful produce. I really wanted to get some food and cook it. Until
later...

Friday, October 9, 2009

Upstate Motoring

A few months ago Paul and I were thinking about where we could take a vacation without busting the bank. He suggested Niagara Falls; it wasn't a high priority for me but I was intrigued anyway and took the bait. We decided to fly to Cleveland, OH and motor the 200 miles to Niagara Falls, crossing the narrow northernmost portion of Pennsylvania and through upstate New York to Buffalo. I just want to say Ohio must be crawling with raccoons, because we saw an awful lot of raccoon roadkill on the two lane highways. We even saw two laid out just a few feet apart in the exactly the same position; we really puzzled over how that happened. I just wish I'd taken a snapshot. I definitely would have shared.

Buffalo is a short drive to Niagara Falls so we decided to make that our roost for the night so we could be fresh for the big event the next morning. The town of Niagara Falls, NY is not pretty. In fact that part of NY is flat and uninteresting, other than the falls. However, there is a park at the falls where you can park your car and see the sights. It's really nicely done and you can ride a shuttle around to places like Goat Island and stand just a few feet from where massive amounts of water are pouring over the cliff. The thundering part happens where the water hits the bottom and sends up oodles of mist. Speaking of mist, I just had to take the Maid of the Mist boat ride. They give you huge hooded and sleeved plastic bags to wear for a good reason; when you reach the Horseshoe Falls, it's like being in a tropical rainstorm. I had no desire to make the hike to the falls after that. Did you watch Pam and Jim's wedding on The Office - well I can attest they really did get on the Maid of the Mist on the U.S. side!

Ok, let's talk food. The food worthy of my note. I had made reservations at a bed and breakfast on the Canadian side of Niagara Falls. I found Bedham Hall through bedandbreakfast.com. Heather, our innkeeper, recommended that we walk the 3 blocks over to Queen Street and try out the Paris Bistro. What we saw first was Mide Bistro and assumed that was the place. It wasn't, but we were really attraced to the energy of the place and strolled right in. They're really into organic, good food. Paul and I are on this kick of frequently sharing meals when we go out to dinner, especially if the servings are large. It saves us money, calories, and bloat. So we decided to share the baked brie wrapped in phyllo, with red wine jelly and crackers. It was delish except the crackers which were dark and dry and not too good. I ordered the Framtini, which is 2 parts framboise and 1 part Skyy vodka (I wormed that information out of our server). It was yummy, a little tart, and I was tempted to have another. Framboise is raspberry liqueur and the Chambord brand is readily available here, but it appears to be sweeter than the locally made framboise we were served. I tried combining my Chambord framboise with citrus infused vodka and I didn't like it at all. (This just in: I emailed Mide Bistro and they use Southbrook Framboise, from Niagara on the Lake, Ontario. So far I haven't found a source for it.) We also shared a huge serving of sacchettini, ricotta cheese filled pasta with a tomato cream sauce, as well as a chocolate cake with caramel sauce and chocolate ganache. Divine. Go there asap.


Breakfast at Bedham Hall was filled with fabulousness. Heather is an excellent cook and my eggs benedict was so decadent, with perfectly creamy hollandaise sauce and real Canadian bacon. The bill of goods we are sold here in the U.S. that is passed off as Canadian bacon is nothing like the real deal. The real deal is more like ham and Paul was digging his scrambled eggs and hamadian bacon.
We decided to go to the Genessee Country Village because, well, it looked interesting and it doesn't appear that there are a lot of tourist attractions in upstate New York. It's a reconstructed 19th century village which really spans several decades from the very early 1800's to the late part of the century. Houses from towns all over New York were brought into the village. All the docents are in period costume and explain what life was like in their assigned building and time period. What really fascinated me was the kitchens and getting the scoop on on cooking way way back in the day. Pat Meade, who I am told is an excellent cook, was cooking in an upscale house from the 1850's, using a fireplace. Here are some tidbits I picked up by picking the heck out of her brains:


  • Wood burning cookstoves appeared in the 1830's, but they were a hard sell for those used to fireplace cooking, hence this house solely used the fireplace
  • Cast iron skillets had pointed legs so that food could be cooked over hot coals that were moved under the skillet for frying, etc.
  • Pickling was extensively used for food preservation. Pat had a big jar of pickled beets; she told me she would use the red pickling juice to preserve a basket of hard boiled, peeled, goose, duck and chicken eggs. They will keep for months without refrigeration. Amazing. What we call iceboxes were called refrigerators. They weren't called iceboxes until the harnessing of electricity which powered what we now call refrigerators! Say that 3 times.
  • Before Ball and Kerr canning jars and lids, preserves were kept in jars, yes. They were sealed one of two ways - a piece of paper was cut out in the shape of the mouth of the jar and soaked in brandy. It was placed on the preserves and then the jar was overlaid with more paper and sealed with eggwhite. Pat said she opened a jar of jam four years old that was still good! The best method for sealing is using a pig bladder - think about it - it's definitely made to be air and water tight!

What I really learned is that we should get down on our knees and give thanks for electricity, natural gas, indoor plumbing and everything else that keeps us from having to be in the kitchen from dawn until dusk!

I also stopped in the Jones farmhouse, where Pat's friend Deanna was making cheese. I've read up a bit on cheesemaking and it's quite a science. Deanna uses buttermilk to introduce bacteria and real rennet from calf's stomaches to make the curd. It actually smelled pretty good in the kitchen were she was cooking the milk. Here's a shot of her wheels of aging cheddar cheese.


There's more food to this trip, like the Jello Museum...stay tuned.

Sunday, September 13, 2009

Just a Teaser

I made the coolest discovery and I just had to share. Ok it was someone else's discovery, but where do discoveries come from, really?

Paul and I were invited to a birthday party and I offered to make a pecan pie. But with me being me, I didn't want it to be just any old run of the mill pecan pie. I subscribe to Fine Cooking magazine, and I must say the recipes in there are pretty reliable. I received the Oct/Nov edition recently and there are Thanksgiving recipes in there for crapsake! Actually, they look pretty good. The real find was in the pie article, specifically the coffee-toffee pecan pie. I initially was put off because the recipe called for Lyle's Golden Syrup as a substitute for some of the corn syrup that is always present in pecan pie. Where was I going to find THAT, I fumed and mentally clicked off.

Well, Thursday I decided if there was a market that carried it, it would probably be Podesto's over on Pacific. So I lured Paul out with me with promises of food finds, and lo - in the syrup aisle sat several cans of Lyle's golden panacea. I snagged a can and determined to make that coffee-toffee pie. The pie uses an all butter crust and it turned out great - flaky, buttery, good texture. The pie was to-live-for, with the richness of toasted pecans, the intensity of a little espresso and the mystery of toffee. Run out and buy Fine Cooking now! I mean now!


Here's the teaser - I took an idea from the filling recipe. I didn't know if there was a possible substitute for light corn syrup - light corn syrup contains high fructose corn syrup which if you've been reading this blog, you know I despise. Lyle's is thick like corn syrup and a pretty golden color. The thrill is I have a great recipe for chocolate almond toffee, which requires that you cook sugar to make caramel and add light corn syrup which contains high fructose corn syrup, which as you know I never miss an opportunity to malign. (Sorry, getting repetitive.)


When I make this toffee again, perhaps for a party, shall we say, I am going to use Lyle's golden elixir of the gods and I expect to get a good result. I will let you know and give you the recipe. Stay tuned...

Monday, August 24, 2009

Tap Dances With Olives


Olive tapenade is a chunky spread of olives, wonderful on toasted baguettes. I got inspired to make some after a wonderful meal last month at Incanto in San Francisco. They were featuring a series of povera (poor? poverty?) meals based on the cuisine of different areas of Italy. Having never eaten goat, I wanted to go nuts and head over the weekend they were serving braised goat with malloredus (a thick caterpillarish looking pasta). It was actually a $30 fixed price 3 course menu with stuffed tomatoes as the first course, then the goat (not goaty tasting) and for dessert some heavenly macaroons. I've got some pictures of our meal here for you. Unfortunately, the pictures were taken after starting to dig in. I have the toughest time stopping to take photos when I'm hungry!


Anyway, Paul flipped over the olive tapenade and asked me to make some at home, which I have done. It's not a tough trick, just throw some olives in the food processor with some olive oil, crushed garlic, maybe some red pepper flakes if desired. Salt is not needed, as cured olives are already salty. Down to basics: I asked our server what olives they used at Incanto and she said Kalamata (Greek) and Cerignola (Italian). When I went shopping the I looked for an olive bar that used to be in a neighborhood market near my home, and...they had taken it out!!! Olive bars are nice; you can buy just what you need. So I ended up buying a tub of assorted cured Greek olives, with the pits in, unfortunately. I mashed the olives with the flat side of my chef knfe and removed the pits.
1/2 cup oil cured olives
1 crushed garlic clove
dash red pepper flakes (optional)
orange zest, grated with a microplane (optional)
minced fresh mint (optional)
(go wild)
drizzling extra virgin olive oil

Pulse process olives, garlic, red pepper flakes until chunky. With motor running, drizzle a tablespoon or so of olive oil. Actually, do it by sight; you don't want a soggy mess, but the oil helps the blades grab hold of the ingredients.

Serve with toasted baguette slices. Try it with some fresh goat cheese and slice of roasted red bell pepper for a heartier snack.


Wednesday, July 15, 2009

Thai Me Up

I have adored Thai food for years now. It's really the one cuisine that inspires me to stuff myself silly. The coconut curries really have a hold on me, and panang is currently my favorite. Making it at home is pretty easy if you buy your paste; Lobo and Maesri brands are two I have tried and like. The problem with these prepared pastes is the astonishing amount of sodium per serving. I think I recall the Maesri containing about 640 mg of sodium per tablespoon! I did look up a recipe in Hot, Sour, Salty, Sweet for red curry, which to me tastes similar to panang (panang has peanut butter in it) and there are lots of ingredients to deal with. The inclusion of shrimp
paste piles on the sodium anyway so let's just say we have it occasionally and call it good. Please note, Asian home cooks tend to use the prepared pastes just like we buy bottled spaghetti sauce.


Kaffir lime leaves are not the same as Persian lime leaves. I brought home kaffir lime leaves and broke off a leaf from my Persian lime tree. When I rubbed both leaves between my fingers the leaf that smelled good was the kaffir lime. So you can't substitute leaves from your tree. The fish sauce is the Three Crabs brand from Thailand. I asked a fellow shopper in the Asian store several years ago which brand she recommended and she said Three Crabs. If you've ever heard of Mai Pham, who owns Lemongrass Restaurant in Sacramento, well she likes that brand too. My helpful fellow shopper also pointed me to Chaokh brand coconut milk and by gum, I'm sticking to it.

Eggplant works really well with curry and having a garden comes in real handy. Paul planted Japanese eggplants and we're starting to get a nice little crop. They went into this curry.
Yummy!

My Eggplant Panang

10 1/2 oz chicken, cut into bit size pieces
1 T oil, neutral, like grapeseed
1 pkg Lobo or 1 - 4 oz can Maesri Panang Curry Paste
1 can coconut milk
1 cup water
2 tsp fish sauce or to taste
5 kaffir lime leaves
1 t brown sugar
1/2 large red bell pepper, sliced in 1/4" wide strips
4 small Japanese eggplant, sliced in 1/2" thick rounds

Saute chicken over medium heat with a little oil until cooked through. Add 1 T oil to 10-12" nonstick saute pan, heat on medium setting. Add bell pepper and sweat for 3 or 4 minutes to get
it a little tender. Push pepper to side and add curry paste to middle of pan and cook for 30 - 60 seconds to release aromas. Add coconut milk and gently whisk into paste. Whisk in water, then
add eggplant rounds, chicken and lime leaves. Bring to gentle simmer and cook for 15 minutes or so, checking for eggplant tenderness. Add the brown sugar to taste in order to tame any harshness. Stir in fish sauce as above or to taste. Serve over sticky rice.

Sticky Rice

Ah, sticky rice. One of the best things about Thai food, although it is actually regional. I believe steamed jasmine rice is more commonly served. When Paul and I dined in a wonderful little place in Ft. Lauderdale, FL, we asked for sticky rice. The owner informed us just a little bit indignantly that sticky rice wasn't served in his neck of the Thai woods. So what - we love it, especially with saucy dishes ladled over it or on the side where one can grab a ball of rice and dip it in sauce like bread. This rice is called glutinous or sweet rice and is available in southeast Asian stores. It doesn't swell up like other rice, it gets sticky. You need to soak it in water for several hours if possible, I allow 2 hours minimum. Rinse the rice well and cook with a steamer basket, using a rice cooker if you have one. I have also set a steamer pan in my steam canner. A cup of uncooked rice will feed 3, possibly 4 people if you aren't too piggy. It is very important not to
let the water touch the rice or you'll have a soggy mess - I know of what I speak! Steam 15 or more minutes; check with a fork and taste for doneness. If desired, cut up some lemongrass and stick it in the rice before steaming to add a subtle citrus flavor.

Before I leave you, here are my favorite local Thai restaurants: Bangkok Restaurant, 3255 W Hammer Ln # 18, Stockton CA, phone 209-276-8616. We've been eating there for years, originally called Nut Pob in a different location. My Thai friend says the flavors aren't authentic, probably because the owners are from Laos. But the food kicks ass, and the geang curry, a yellow curry with chicken, potatoes and carrots is addictive. I think it's part of the cause of my weight problem!! I haven't had better pad thai than theirs, and the tom yam gung (hot and sour soup) is to die for. Or at least roll around on the floor.

Thai Basil has several locations and is family owned. Go to www.thaibasilrestaurant.com/ for
menus, etc. The Elk Grove location is the closest to us, at 8785 Center Pkwy # B120, Sacramento (really Elk Grove - Laguna district), phone (916) 681-8424. It's a bit, no a lot more gourmet, and a little more expensive, but worth it. We had an amazing dinner at the J St. location in Sacramento - 2431 J St - (916) 442-7690 and were able to eat outside in the garden.
Lucky, because the joint was jumpin'.

Tuesday, June 16, 2009

Eat Your Veggies - Part 2

I suspect brussels sprouts are possibly the most hated vegetable on earth. And why not? On the rare occasions they were served they were presented as overcooked, mushy, smelly green things. Several years ago when I discovered the pleasures of roasted vegetables, brussels sprouts became more acceptable. But it was when I had dinner at Rivoli, in Berkeley, that the scales really fell from my eyes (and tastebuds.) These sprouts were shredded and caramelized in brown butter, with freshly squeezed lemon juice at the finish. On the way out I stuck my head into the pass-through and asked the line cooks how to make my own sprouts and they willingly gave me the scoop.

In order to take some pictures of the work in progress, I cooked you some
sprouts. I hope you enjoy them!

Ingredients: 4 oz or 6 brussels sprouts per person
About 1 tablespoon or so butter per serving
salt and pepper to taste
good squeeze of lemon juice


Slice your sprouts about 1/8" or so thick.


Brown your butter in the skillet over medium heat. Be very careful not to burn it. This photo shows how brown I let the butter get.


Let the sprouts caramelize, stirring occasionally with a wooden spoon to keep from burning. When the desired tenderness and caramelization have been reached, shake on salt and pepper to taste and off-heat, squeeze the lemon juice all over. Stir to delaze the pan and serve.

Wednesday, June 3, 2009

Eat Your Veggies, Part 1

Stockton is probably the asparagus capital of the world; at least that is the rumor. It has also been the home of the Asparagus Festival for over 20 years now, drawing large flocks of asparagus lovers. Ok, they love to eat deep fried asparagus and drink aspara-ritas. And beer. I have worked as a volunteer several times as well as lay my money down as a paying guest. I hadn't gone in a while, but this year The Tubes, a crazy band from the 70's and 80's (think White Punks on Dope) were coming to the festival and I had to be there, with Paul and Bob and Rita as my sidekicks. The show was great and I totally skipped the deep fried asparagus, while unfortunately buying a completely tasteless gyro sandwich. Just how does that happen??? I mean the tasteless part.

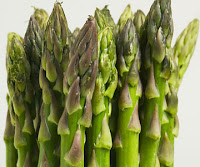
I do like asparagus, although the steamed variety, even with mayo on the side, is pretty boring. I like my spears roasted or grilled, with olive oil and whatever seasoning sounds good to me at the time.


The weather hasn't gotten hot yet here so warming up the oven isn't a problem for me. A nice hot oven, say 450°, will do the trick. Snap off the hard fibrous ends of the spears and put the asparagus in a baking pan with olive oil and salt and pepper or your favorite seasoning. Bake for 7 minutes, then shake the pan to flip the asparagus around and then bake another 5 minutes
or so, checking for tenderness with the tip of a sharp knife. There will be caramelized spots. This works best for thick spears, not pencil thin ones, which cook much faster. If you use the thin ones, just check them sooner.


You can grill asparagus also, but lay them across the grates so they don't fall through. Skewering 3 or 4 or 5 together crosswise, then oiling and seasoning your asparagus before placing them on the grill works nicely. I like to grill over indirect high heat to avoid flameups. Just check the veg progress in a few minutes.


Now these are Spears that can enhance your life! Enjoy.

Friday, May 22, 2009

Under Pressure, Part Dos

This morning I asked Paul to go to Kinder's and buy some peppered bacon. Kinder's is on a street nicknamed the Miracle Mile, and has a small meat case. Their bacon is thick sliced and flavorful. Their barbequed chicken quarters are smoky and heavenly. So after I got home from work he called to tell me he'd bought some ribs for us to throw on the grill.


It was a nice little rack, with just seven bones, and meaty. Now as we all know, real bbq is smoked low and slow. For hours. Endlessly. Grilled ribs are tough and not that much fun to eat. We wouldn't be eating real bbq tonight, and tough and stringy sounded bad. Here's what I did.


I haven't cooked ribs in several years, but what I used to do was simmer the ribs in water until they were tender and then throw the on the grill. What blasphemy! I actually got the idea from the movie "Fried Green Tomatoes," where they tended the big pot of meat simmering outside the cafe. I didn't want to leach the flavor of the meat out into the water, so I decided to use my pressure cooker, which doesn't entail submerging your food. My cooker has a steaming plate, so I placed the ribs on top of the plate and added just enought water to cover the plate. So easy! I closed up my cooker, brought it up to high pressure and kept it there for 30 minutes, then utilized the quick release by pressing down on the valve. The ribs were just tender, and one rib bone fell out. You can cook them a little longer if you want, but it's hard to wrestle a rack around on the grill when it's falling apart.


An old friend, Dr. Jack, used to grill his chicken by cooking on layer upon layer of bbq sauce after the pieces were done. Turning every few minutes after laying on the sauce built up loads of flavor. I used that trick with my ribs. I basted both sides with sauce (use your favorite kind) then laid the rack down over indirect heat. I turned it every 4 or 5 minutes, brushing on more sauce, about 6 times. Go wild if you want. I basically stopped when the rest of dinner was ready.


Now, is this method as good as ribs smoked for 12 hours or more? What a silly question! No way, now how! But they were tasty and if you have a pressure cooker the process is a snap!

Wednesday, April 15, 2009

Under Pressure

I have some vivid kitchen memories from my childhood: one is Grandma Brown's pressure cooker whistling away on the stove, with the "jigger valve" a rockin'. All urban legends aside, no dinner ever exploded all over the kitchen; I guess she was just too savvy for that. Another one is watching her can fruit with her big steam canner, with the nice big rack full of jars. Since she always looked hot and sweaty while canning, I had no desire to ever get involved even up until last summer. Of course, the fact that she was close to 50 at that time and didn't take hormones may have contributed to her too-rosy cheeks.

A good ten years ago I took a pressure cooking class and ended up buying a new, non-exploding cooker by Kuhn Rikon. I had a great time cooking one pot meals for quite a while. But the love affair cooled off and now my cooker is relegated to making mashed potatoes, steaming artichokes, and Paul loves to cook midwestern style green beans with it. Hint - for mashed potatoes - if using large potatoes cut into thirds. throw in the pot with some water and cook for 15 minutes after bringing up to pressure. Quick release the steam, pass the potatoes through a ricer, and mix with milk and butter or whatever you prefer. It's very easy.

Last summer Paul and I canned peaches with my friend Rita, an old pro at canning. It was pretty fun and we ended up with several quarts. I made up the simple syrup, in this case 2 parts water to 1 part organic sugar. Or simply, 1 cup water to 1/2 cup sugar to make a light syrup. Just bring it to a strong simmer to dissolve the sugar. It's delicious and brings out the natural flavor of the peaches.

This got us thinking about canning tomatoes. There are some pretty good reasons to do this. It seems that the lycopene (antioxidant) in cooked tomatoes is more absorbable than in raw tomatoes. When canning you can use the best possible ripe tomatoes; Paul planted 4 different types (1 plant each) and we're hoping we get a nice crop this year. You don't have to add salt; have you looked at the sodium content of most commercially canned tomatoes? Also, Bisphenol A (BPA) is found in the epoxy liner of most commercial food cans. It can mimic estrogen with all the attendant problems that entails. Try googling zeno-estrogens; you'll get an eyeful!

Now we're looking at getting a pressure canner, which really pours the heat on, much more than a steam canner. You really have to put the heat screws to vegetables as well as add citric acid - because you don't want to breed BOTULISM. (And yet there are those who inject it in their faces.) In case you don't know, botulism thrives in anaerobic (no air), low acid environments. A small amount, if ingested, will cause paralysis, let's say in the lungs for starters, and most probably will end with death. Grandma Brown used to scare the crap out of me about botulism and I was sure I didn't want any of that!

Paul is determined to find a used pressure canner so last weekend when we went for a ride in the foothills and stopped at yard sales and thrift and new-to-you stores to try our luck. Fortune wasn't with this that time, but it's still early. Frankly, I'm a little leery of buying used equipment but I'll try to keep an open mind. And, hey, we don't have tomatoes yet, so there's a little time. Wish me luck!

Thursday, March 19, 2009

Plaintains & Salsa & Key Lime Pie - Oh My!

I belong to a gourmet cooking club, the "Foodies." We get together every few months for a meal that everyone has helped cook and generally have a great time. Alcohol is always involved. Recently I decided to host again, which generally means putting a menu together and offering up assignments, and preparing the main course. Braising is a favorite cool weather cooking method of mine and I really wanted to cook up a pork shoulder, which is cheap right now. Cheap and good equals a big YES! My favorite braising cookbook is All About Braising, by Molly Stevens, and I highly recommend that you get a copy. She writes endless instructions, which is great for beginners, though a bit too endless for me. Since her recipes are really really good, I forgive her. I am not going to copy her recipe down for you, but briefly, I made a Caribbean braised shoulder, marinated with crushed coriander seeds, allspice berries, garlic and other goodies as well as orange and lime juices. Everybody went nuts over it, so go buy her cookbook!

Since we were going Caribbeanesque, fried plaintains had to be included. They aren't at all difficult to prepare and are really good as long as you serve them with something tasty on the side. Be sure to sprinkle with a little salt, otherwise they are bland.

Fried Plaintains (Platanos)

2 large very green plaintains
vegetable oil
kosher salt

Peel the plaintains by cutting off each end, then slice through the peel all the way down the side. Pull off the peels - they are really stiff and a little challenging to remove. Cut slices crosswise about 1/2 inch thick. Heat enough oil to cover bottom of large nonstick frypan. Oil should make small bubbles when you add the slices. Don't overcrowd the pan. Fry until golden, turn and brown other side. Remove to paper towels to blot oil, then mash down to make them fairly flat, about 1/8 inch or so thick. Add more oil as needed; fry the batch a second time, sprinkle with a little salt. Repeat with remaining slices. You can safely keep them warm in a 200° oven until serving time for half an hour or so.
While nosing around different ideas in order to come up with a salsa to serve with the plaintains, I was reminded of the basics for building salsas. A little onion, cilantro and some heat are my holy trinity of salsa making. Add the kinds of fruits you enjoy; I chose starfruit, pineapple and fresh mango. I didn't want to use a whole pineapple so I bought an 8 ounce can of pineapple chunks in their own juice, which worked great. You don't have to limit yourself; try some other fruits that look good to you in the produce aisle. If pomelo had been available when I was shopping I would have added it too. Pomelo looks like a grapefruit, has a very thick rind, and has a mild grapefruity flavor. If you use a pomelo or other citrus fruit you need to supreme it, meaning slice off the skin and rind, down to the fruit. Then cut the slices away from the membranes; a sharp knife is mandatory unless you like mangled fruit.


Chunky Tropical Salsa

2/3 of a large starfruit
8 oz can pineapple chunks canned in their own juice
1 medium mango
about 1/2 small red onion, diced small
1/2 red jalapeño, minced
1 tb chopped cilantro leaves
juice of 1 lime
pinch kosher salt

Cut all fruits into 1/4 inch chunks. Mix fruit together, then add in onion and jalapeño a little at a time, so as not to overpower the salsa. Do the same with the cilantro. Stir in lime juice. Taste. One or two pinches of salt will bring out the natural flavors of the salsa. You don't want to taste the salt. Yields about 2 cups. Serve in a bowl garnished with starfruit slices if desired, and fried plaintains on the side.
Note: this appetizer was a huge hit; not a bit was left over. Try it with my blessing!

In my humble opinion, no tropical meal is complete without key lime pie. About 20 years ago Paul and I went to Florida, namely Orlando, so I could feed my inner kid and play in Disney World, and then down to Key West. I got hooked on two things - melon coladas and key lime pie. Charlie's Steakhouse and Seafood in Kissimmee had great food, but what thrilled me was the soft serve melon coladas! Oooh baby I mean a real soft serve machine! Innocent that I was, I'd never experienced that before. And they were delicious! Sadly, even though I tried them in other places, they just didn't thrill me. After coming back home I bought a bottle of Midori melon liqueur in a pitiful effort to feed my addiction but I couldn't replicate the coveted flavor and had to give it up. Forever. At least until I return to my soft serve lover in Kissimmee.

The key lime pie story has a happily ever after ending. We ate that pie every single day on our trip. Sometimes twice. The most memorable incident was in the Florida Keys, Islamorada, I think. We had a wonderful Cuban lunch at Manny & Isa's, and of course, Isa's key lime pie. She was nice enough to give me her recipe. The common denominator of every single k-l pie we had was raw eggs, which I resisted using. I absolutely don't remember where I got it, but I snagged an eggless recipe and wrote it on the same postcard on which I recorded Isa's instructions. My commitment was sealed by buying a bottle of key lime juice at the Piggly Wiggly Market in Key West.

I asked Kendra to make the pie for our dinner. She balked when after searching for recipes and continually coming up with raw eggs and EGAD sweetened condensed milk, which she somehow equates with Velveeta. (I'm going to make a confession - I like Velveeta Shells & Cheese. Shhhhhh) When I gave her my recipe her feathers were smoothed out and she was happy. And it was delish.

Eggless Key Lime Pie

1 package cream cheese, softened
1 can Eagle sweetened condensed milk
6 ounces key lime juice (juice from Mexican limes works too)
Graham cracker or other prepared crust, such as chocolate cookie

Mix first 3 ingredients well; a mixer is helpful. Pour into prepared crust. Refrigerate for several hours. Top with whipped cream. Garnish with a mint sprig or lemon verbena, if you have it.

Thursday, March 12, 2009

The Neck Bone's Connected to the Head Bone

Paul recently asked me to make beans and cornbread and I said I would. I don't cook up a mess o' beans too often, despite writing a while back about baking soda and the gas factor. In the past when making slow cooked down home rustic beans I've used smoked pork hocks. They add a nice smoky flavor as well as a little meat, but the downside is the giant hunk of skin that has to be removed, along with the pool of grease floating on top. So, while perusing the meat counter, I noticed smoked pork neck bones sitting next to the hocks and turkey necks. The neck bones looked fairly meaty and lean so I decided to be daring; afterall, neck bones have been used in southern cooking for ages, right???


In addition, I decided to get out my big crock pot - not the old kind from the '70's you try to wash without getting the cord wet. You can actually take the crock out and wash it! Yay! I figured I'd soak the beans overnight and then cook them in the pot all day while I was at work. No baking soda duties as I wanted to crock'em. Well, they cooked all day on low and when I checked them the beans were still crunchy and the meat was clinging to dem bones. Horroirs! (as Pepe LePew would say) I went to Plan B and poured everything into a soup pot and simmered away for another 1-1/2 hours, until the meat was falling off the vertebrae, so to speak. Also, there wasn't much of a gas factor, if you get my drift. Here's the recipe:


1 lb. dried pink beans
1 package smoked pork necks (about 1-1/2 lbs.)
1 small onion, medium chop
1 small carrot, diced small
1 tb chili powder, such as Grandma's or Gebhardt's
1 tb Spanish hot smoked paprika
1/4 tsp cayenne
1 14.5 oz can reduced sodium chicken broth
enough water to cover by at least 1 inch
anything else you'd like to throw in


Soak the beans overnight, covered with water by at least 2 inches. Drain
and rinse.


Using a large crockpot, add the necks, cover with beans, and remaining ingredients, stir, cover, and fire that baby up - on HIGH. Start first thing in the morning and let it go all day. Meat should be falling of the bones - remove the vertebrae and serve. Please note I don't mention salt; between the smoked necks and chicken broth we didn't need any. So adjust your seasonings at the end. The carrots add sweetness; I cut them small and they actually dissolved into the dish. Sue said it tasted like a cassoulet - a French rustic dish with beans, sausage and esoteric duck legs. Except no duck or sausage, just good ol' American pig necks!


Speaking of beans, here's an interesting movie I snagged from Netflix: Off the Menu: The Last Days of Chasen's. Chasen's was a restaurant that the Hollywood crowd frequented during its heyday. The glitterati weren't the interesting part - the fascinating part was the people who worked there! I loved the waiter who was on a first name basis with Frank Sinatra. Ok, back to
the beans: Chasen's chili was so popular that Elizabeth Taylor had it shipped to her in Rome during the making of Cleopatra. You can get the recipe here. I have it on good authority that this is the real mccoy! I am going to try it out sometime this year; let me know if you do too!

Wednesday, February 25, 2009

Foamology


Foamology: The study of foam. Way before the coffee joint that employs me came to town, indeed, before Starbucks hit Stockton, we got our first espresso place that I know of, House of Shaw, a (I thought) snooty pseudo-intellectual coffee joint. I wasn't at all interested in coffee, but when Safari opened up years later near my house, serving cafe mochas, that was a revelation. I developed a taste for espresso and naturally, strong coffee at home with half and half and sugar. Safari ultimately hit the skids and Starbucks came to town and I was seduced by their mochas. Looking back I realize now that when you decline the whipped cream your drink is served flat - that is just steamed milk, no foam. When I started working at my coffee house I learned something new about coffee drinks - the concept of finishing off the latte or mocha with a little foam on top.

Learning how to make good foam was very challenging for me; the first time I tried it I ended up spraying milk everywhere! However, since I was informed that I had to become a functioning barista I soldiered on. My dogged persistence paid off and now my foam is real purty! In fact I love making foam and am right disappointed when the customer wants her drink "flat," that is, foamless! Good foam is creamy and looks downright decadent. Who needs whipped cream when you can have a frothy head on your latte without adding extra calories.

Now let's talk cappuccino talk. They are the royalty of espresso drinks and the hardest to master. When Paul and I cruised the Mediterranean in 2007 we spent some time in Italy, la mamá of the cappuccino. We bellied up to the bar in Rome, Genoa, Ravenna, even in Malta (an island not part of Italy) and drank molto buono traditional cappuccinos. So much fun and such wonderful, wet foam! (Don't get me started on the gelato.)

How to order: a traditional cappuccino should have lots of creamy foam and be fairly light. There really shouldn't be any milk on the loose in your cup, although it will separate from the foam soon enough. When the barista calls you to come get your capp you better come runnin' - your drink will visibly shrink real soon just sitting on the bar. A dry cappuccino is a feather weight wonder that I don't really understand. But some people like getting a snootful of basically just air and espresso, so god bless'em. A wet cappuccino has some milk at the bottom, maybe 1/4 to 1/3 at the most, and the rest foam.

In my last blog I mentioned stopping in at mom and pop place in Mendocino. I asked for foam and received it not. Since I had grown accustomed to bad drinks on that trip I didn't bother to argue. But I have an idea; next time you go to Starbucks or some other coffee joint ask for foam and see what happens!

Saturday, January 31, 2009

Road Trip 101

Paul and I love road trips. We managed to arrange a four day weekend last weekend so we could take a mini vacation and decided to go back to one of our favorite places, the Northern California/Southern Oregon Coast. Honestly, going that far up 101 and back is quite a trip in just four days. But there is always a plan which seems to work: spend the first night in Eureka - a fishing, lumber, and frankly, being in Humboldt County, a marijuana farming area. At least, the marijuana part is a popular legend, and legend or not, you won't find me wandering in the woods, accidentally stumbling upon a "ranch" and never returning.

Back to Eureka, which has an attractive old town area with restaurants and shops by the harbor. We got our mitts on a restaurant guide, and there were some pretty interesting options. We chose Avalon, an upscale dining room which was decorated inside like a winter forest. I should have taken pictures, sorry! I had a delicious cocktail, with Hangarone Raspberry vodka and meyer lemon whatsit and other goodies. It was so tasty I wanted a second martinki, but being a cheap albeit happy drunk I nearly knocked over my empty martini glass and realized I had better stop. The food was really good; my braised lamb shank had great flavor but I do wish to had been cooked a little longer. I like the meat to fall off the bone. Paul loved his gnocchi dish. We both gave it a thumbs up and highly recommend the Avalon dining experience. It's a little expensive and for special occasions; we made up for it by eating at KFC in Brookings the next night!!!!!

Up the road north of Eureka is the pretty little town of Trinidad. It's up on a cliff with a harbor down below. The real attraction for us is Katy's Smokehouse. Paul and I stop there without fail everytime we head that way and buy the amazing smoked salmon. The Lakes bought Katy's business 20 years ago and really seem to love their jobs. This time I also bought a couple of cans of their sashimi grade tuna. They swore up and down it's way way better than the carvahlo tuna that comes from that area, and is low in mercury. I'm looking forward to popping open a can and giving it a try. I was pleasantly surprised to learn that Judy Lake was an instructor for the culinary program at Delta College for several years! How small is this planet anyway? Anyway, while in Trinidad you can grab your smoked salmon, take some crackers and sit on a bench right next to the lighthouse overlooking the ocean and have a little picnic, which is exactly what we did. Sweet.


Way way up the highway (by the way, highway 101 is a whole lotta two lane highway) is Brookings, OR, our destination. Now, sadly for me I haven't found any amazing coffee places up in those hinterlands, so I wasn't getting any really good coffee. Heck, it was pretty pee poor. However, there is a pretty cute drive-through espresso chain that I couldn't resist trying, Dutch Brothers Coffee. The visuals are great; just look! Paul and I shared an Annhilator - steamed half and half, chocolate, macadamia nut and espresso. It was pleasant but not earthshaking, but like I said the visuals are really cool.


Brookings is a town on the cliffs with the harbor below like many west coast sea towns. I absolutely love to stay at the Best Western Beachfront down in the harbor. It's on the beach and every room has an ocean view. When the weather is nice I like to leave the balcony sliding door open and listen to the waves break all night. However, the weather was cold, natch, so no dice this time.

At the north entrance of the harbor is a little cafe called the Oceanside Diner. Paul had spotted it and I agreed to try it. The diner is a shrine to Nascar, even with a race video playing! The menu is simple and I really like the fact that you could get a lite, small or medium portion. We each
ordered the lite egg, hash browns and toast, lite meaning one egg with a smaller portion of potatoes. It was all cooked perfectly and the english muffin was toasted and then griddled with butter. I know, because I asked the cook/owner how she did it.


Heading south again, we stopped in Klamath, a wide spot in the road. It's part of the Yurok reservation and we dropped into a little business that sells salmon jerky. I didn't really see a sign other than Salmon Jerky. You can't miss it, plus there's always a wood fire burning by the road. I highly recommend the 5 day smoked salmon, it's chewy, a bit like jerky. Just know salmon jerky isn't dry and thin and leathery like beef jerky; it's much better. We also bought what I call salmon candy. It was smoked with brown sugar and pretty sweet and yummy. That got devoured in the car in no time!

During the trip home we decided to cut over to Highway 1 and go through Mendocino. There is Moody's coffee house; my drink was poorly made, but I give them points for 1) using organic milk and 2) having agave nectar available. Maybe next time I should go behind the counter and make my own drink.. That would go over great!

I love to go away and I love to come home. There's no place like it!

Thanks for visiting. If you'd like to get my occasional posts by email, just sign up at the top of the page. You won't get a constant barrage. I promise!

Monday, January 5, 2009

High Class Cocktail Wieners

I am hooked on Top Chef. Part of the thrill is watching these professionals struggle with ridiculous challenges. I always internalize the show, convinced I'd be one of the first casualties. Now, I gather the first order of business is to prepare a dish that tastes good, as it should be. But it also has to look good; actually, not just good, but as if some cook worked it over with tweezers, squirt bottles and any manner of magic devices. While working in the Student Chef, particularly in the pastry section, my peeve was the fussiness of the desserts we had to serve, with all manner of fluff, tuiles, swiriling syrups, and flying buttresses. Just give me an incredible tart or an amazing piece of chocolate cake with some unbelievable gelato, and for crapsake, not too much whipped cream!

When Top Chef's head judge, Tom Colicchio, is displeased, he often asks "what were you thinking?" That just chills me to the bone! So, I hereby offer you an appetizer that would probably pass the taste test on Top Chef, but because of the lack of squirt bottles would probably get me the boot, along with an inquiry about my thoughts. However, let me say these wieners are so delicious and so much better than being stewed in sauce for hours, that it just doesn't matter.

This is so easy it's sinful, consisting of Litl Smokies sausages, bacon, brown sugar and toothpicks. Preheat your oven to 350 degrees. A one pound package of Litl Smokies would be very sufficient for a moderate size party. Wrap each sausage with bacon and secure with a toothpick. To do this, cut a slice of bacon crosswise into three equal pieces. If your bacon is thick, cut it lengthwise too, so you end up with six pieces. Therefore, use one slice thick bacon for 6 sausages, or one slice regular thin bacon for 3 sausages. If you have a half sheet pan like professional kitchens use (actually they use full sheet pans), line it with parchment paper and place all of your bacon-wrapped smokies in the pan. Cover liberally with brown sugar. Pop in oven and bake for one full hour. The sugar will be fabulously caramelized. Turn the wiener over so the glazed side is up for serving and for heaven sake don't leave them sitting in the pan full of rendered bacon fat, as they will be greasy.

I made these for New Year's Eve and was going to add some cayenne to the brown sugar so we'd enjoy some sweet heat, but since peppered bacon was used I decided not to push it. Next time...

Finally, thanks to Kathy Curtis for taking these to a holiday party and giving me the recipe. Kathy, you're the bomb!